Your Multiverse with Git
20-08-2025
Git is a tool used for file version control. It allows us to have local version control, which we can optionally push to a remote system.
Git was originally conceived and is often explained using the analogy of a tree. However, nowadays, with the idea of the multiverse being so present, we can give it a more refreshing approach for people new to the world of development.
The Sacred Timeline and Canonical Events
Let's start with the concept of a repository. When we talk about a multiverse, we refer to a set of variations of the same universe. The repository is the concept that encompasses all these variants (branches) and canonical events (commits) in one place, allowing us to work with all of them.
To indicate that we want to turn a directory into a Git repository, we must run the command:
git init
This will create a .git directory where all the information related to version control will be stored.
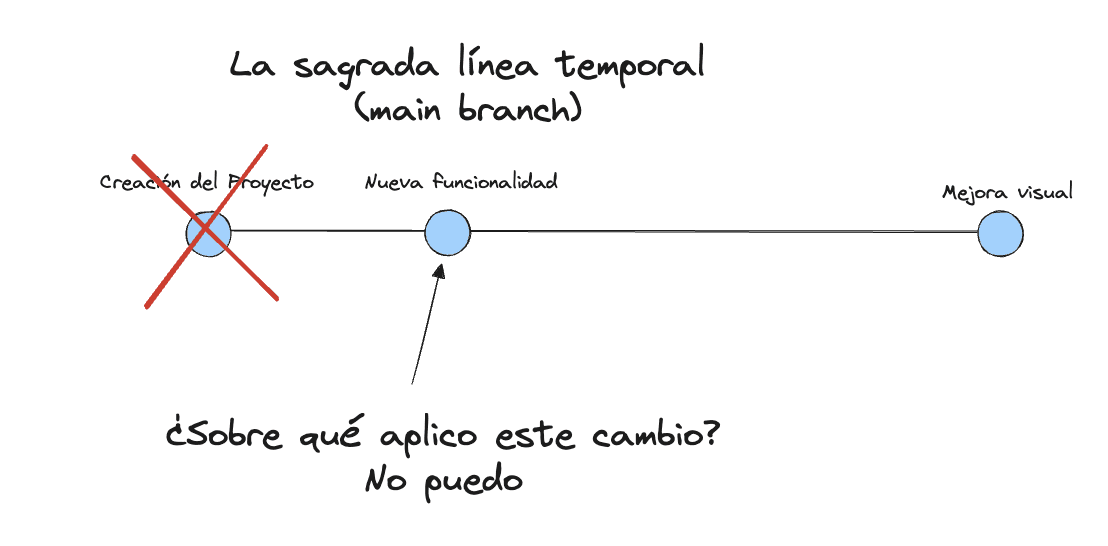
Git works like a timeline in which we can record changes to files, as if they were canonical events, from our directories at a specific point in time, which is known as a "commit".

The events that occur on that timeline are not stored in their entirety for each commit; instead, information is added incrementally based on the previous commit.
In other words, without the previous information, an event on the timeline would lack the necessary data to be reconstructed.
To observe the state of our timeline, we can use the following command:
git log
Each time we want to indicate that the changes we have made should be staged, we must add them with:
git add [nombre de el/los ficheros]
Or, as an alternative, we can tell it to add everything in the directory we are currently in:
git add .
To visualize the state of our stage we can use the following command:
git status
Once we have the changes in our stage, we can decide to create that "canonical event" or "commit":
git commit -m "[el mensaje descriptivo que decidamos]"
We can also combine the add and commit commands into a single one as follows:
git commit -a -m "[el mensaje descriptivo que decidamos]"
💡 As you may have noticed, it is quite inconvenient to manually add all the files, but
git add .adds everything. There is a file called.gitignorelocated at the root of the repository, where you can specify all the directories and files you want to ignore. For example: build directories, installed dependencies, files with environment variables or secrets...
💡 There are conventions for creating these commits, such as gitmoji and Conventional Commits
Temporal Branches
As in any time travel that gives rise to a multiverse, alterations of the timeline can occur, creating branches that follow their own path with respect to the original.
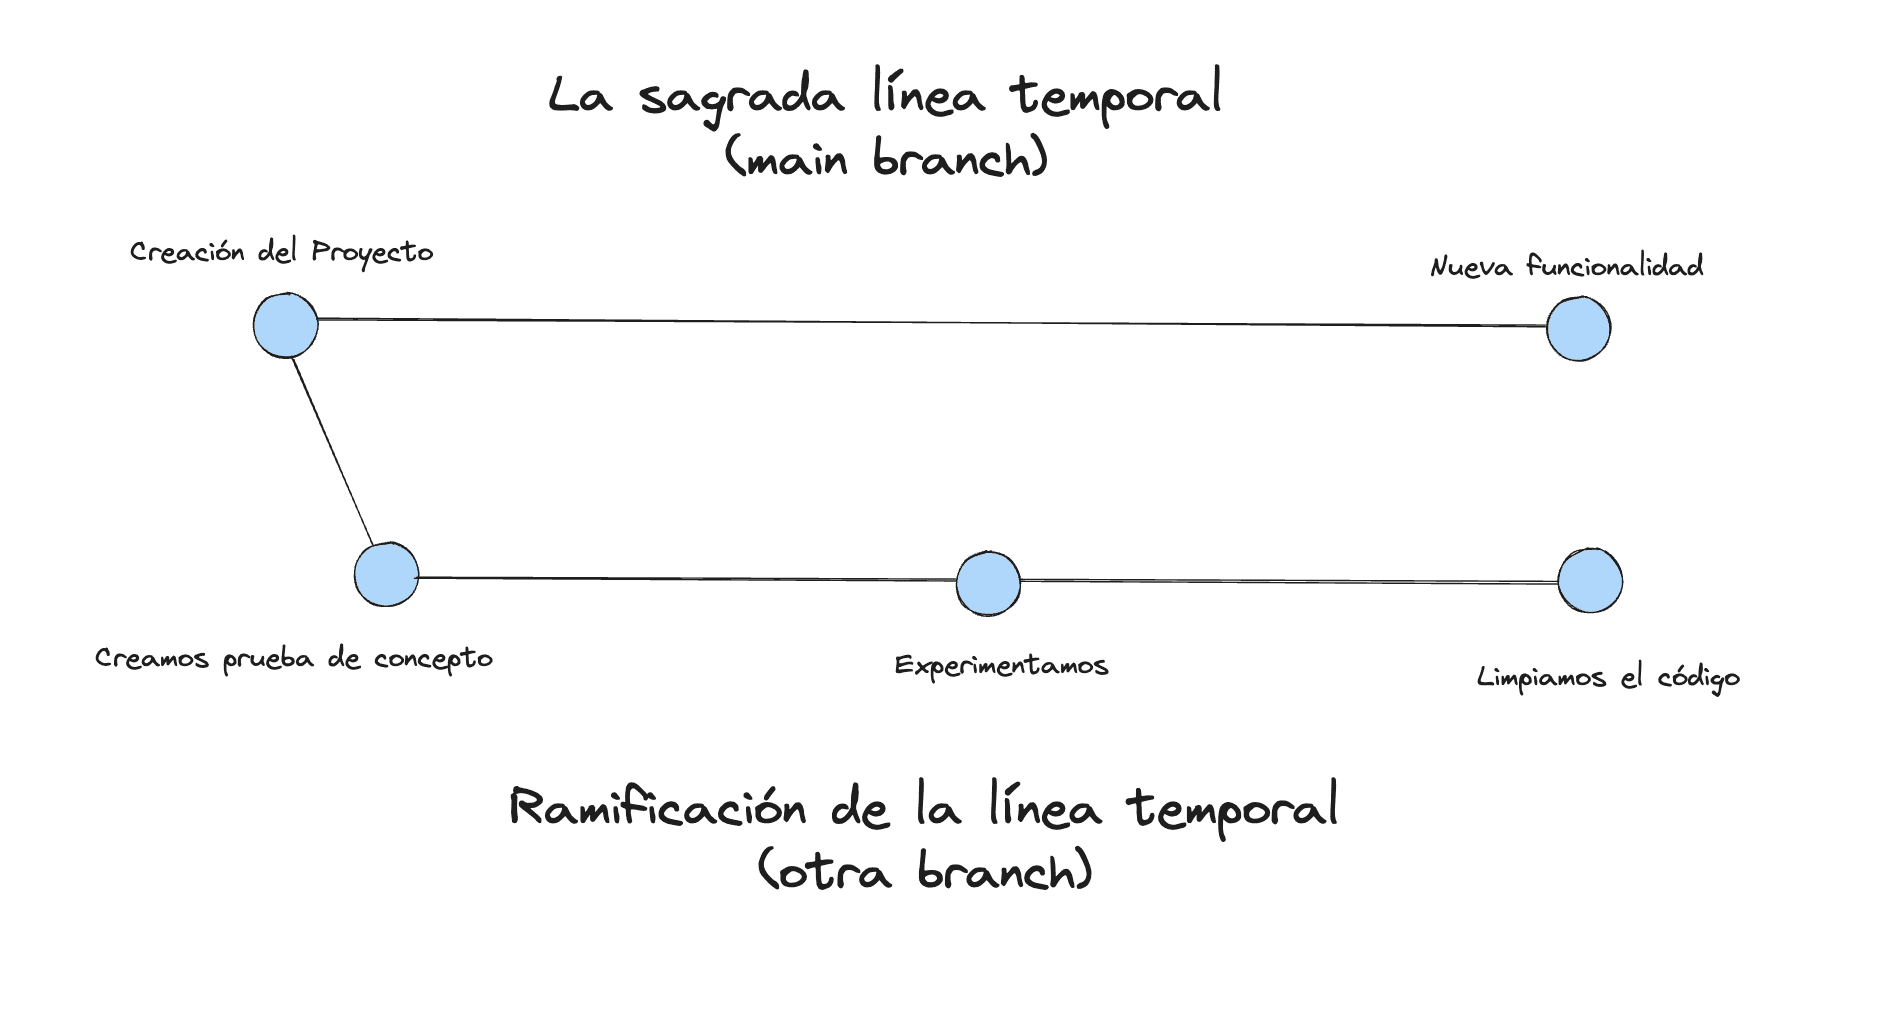
In Git, besides the main timeline (often called main or master), we can create temporary or parallel branches, known as branches. Branches allow us to experiment with new features, fix bugs, or develop new functionalities without affecting the main timeline.
Git checkout -b
When we want to create a new branch and switch to it, we use the following command:
git checkout -b [nombre-de-la-rama]
This command creates a new branch and automatically switches us to it. From this point on, any commit we make will be recorded in this new branch, keeping main intact.
Git checkout
Once we have finished working on a branch and want to return to another one (for example, the main branch), we use:
git checkout main
This command moves us to the main branch, where we can continue working or merge the branches we have created. It is important to note that we should always make sure all our changes are saved before switching branches, otherwise Git will ask us to resolve any pending changes.
An important part is that these branches can be reintegrated into "The Sacred Timeline" or even into each other, although the latter is not usually a recommended practice.
Now, the only way we can unite two timelines is if they are congruent with each other and do not create conflicts. If this happens, we must be the ones to decide what the resulting state should be.

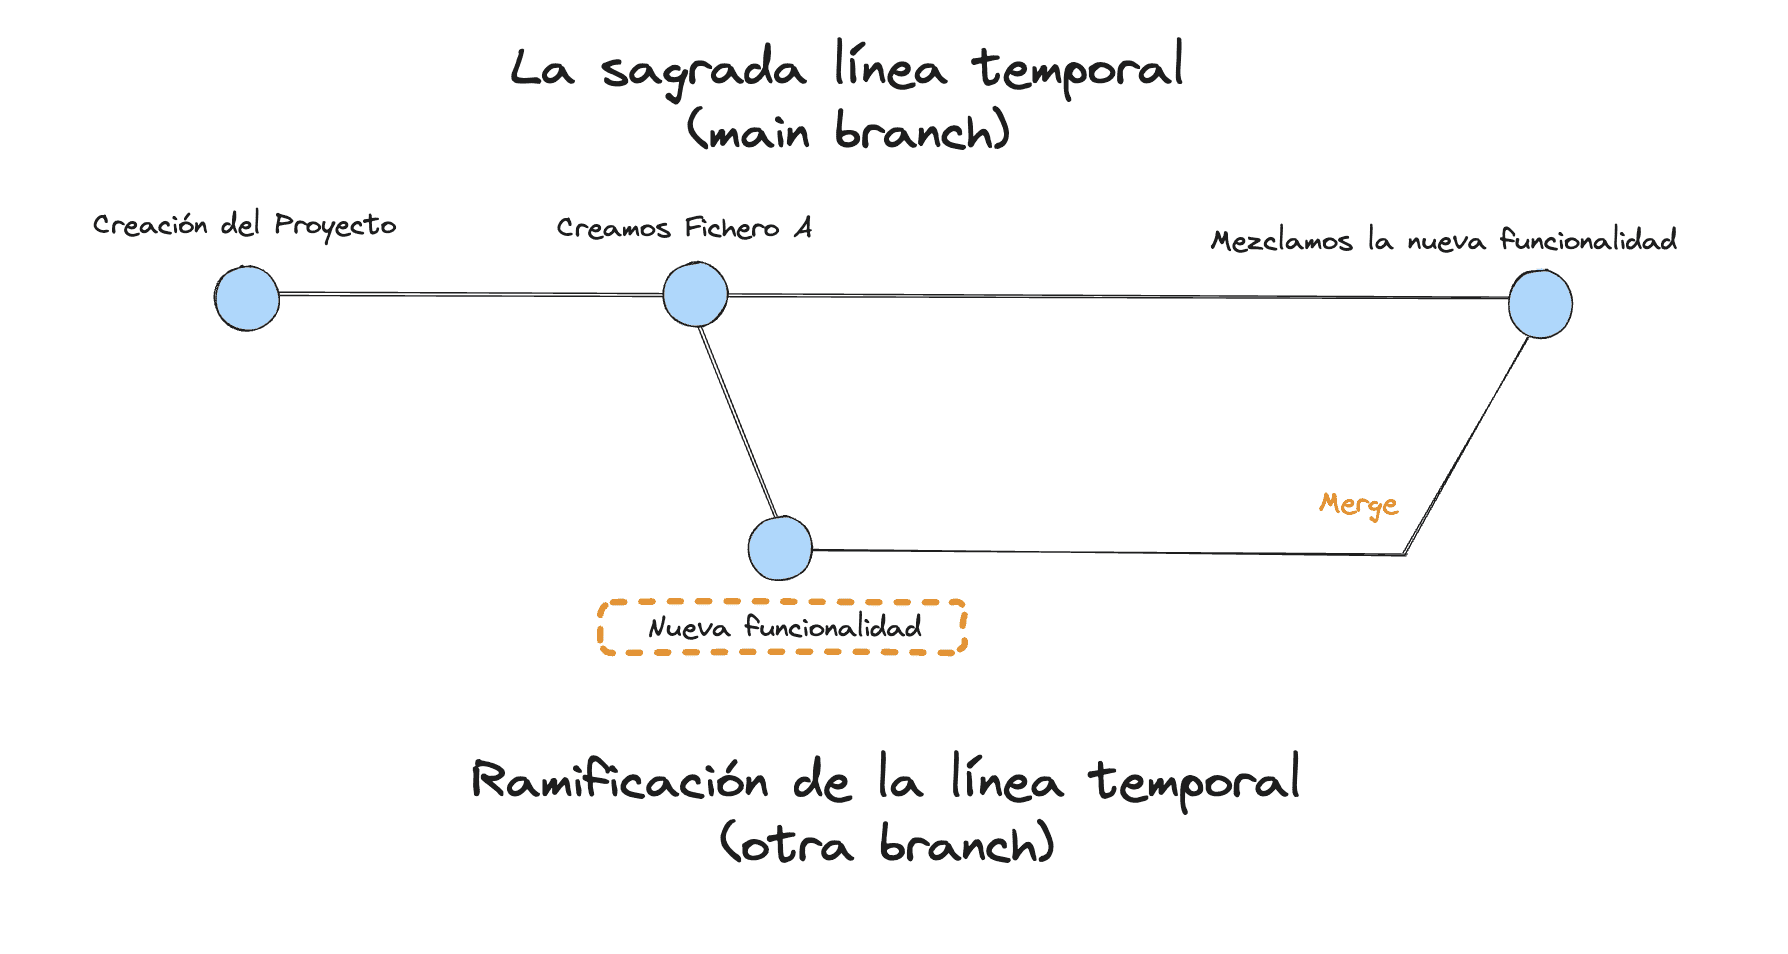
Git merge (branches over branches)
To integrate the changes from one branch into another, we use the git merge command. Suppose we are on the main branch and want to incorporate the changes from a branch called feature:
git merge feature
This will combine the changes from the feature branch into main. Git will automatically attempt to merge the changes, but if both modified the same lines of a file, a conflict will occur that must be resolved manually.
Conflict Resolution
When a conflict occurs, Git marks the conflict areas in the affected files. You must edit these files to resolve the conflict and then continue with the merge process:
git add [archivos-resueltos]
git commit
This will complete the merge, applying the combined changes.
Sharing the Timeline
Git not only allows us to manage our versions locally, but also allows us to share this information and collaborate with other people. For this, we use remote repositories. A remote repository is a copy of our repository hosted on an external server, which all team members can access. This is useful for maintaining consistency between different development environments, ensuring that all collaborators are on the same "timeline".
Considering "The Sacred Timeline", this should be the main branch found in the remote repository.
Git Remote
To work with a remote repository, we first need to tell Git what that remote repository is. This is done using the command:
git remote add origin [URL del repositorio]
This command links our local repository with a remote repository that, by convention, is usually called origin. The repository URL is the address where the project is hosted (it can be on GitHub, GitLab, Bitbucket, etc.).
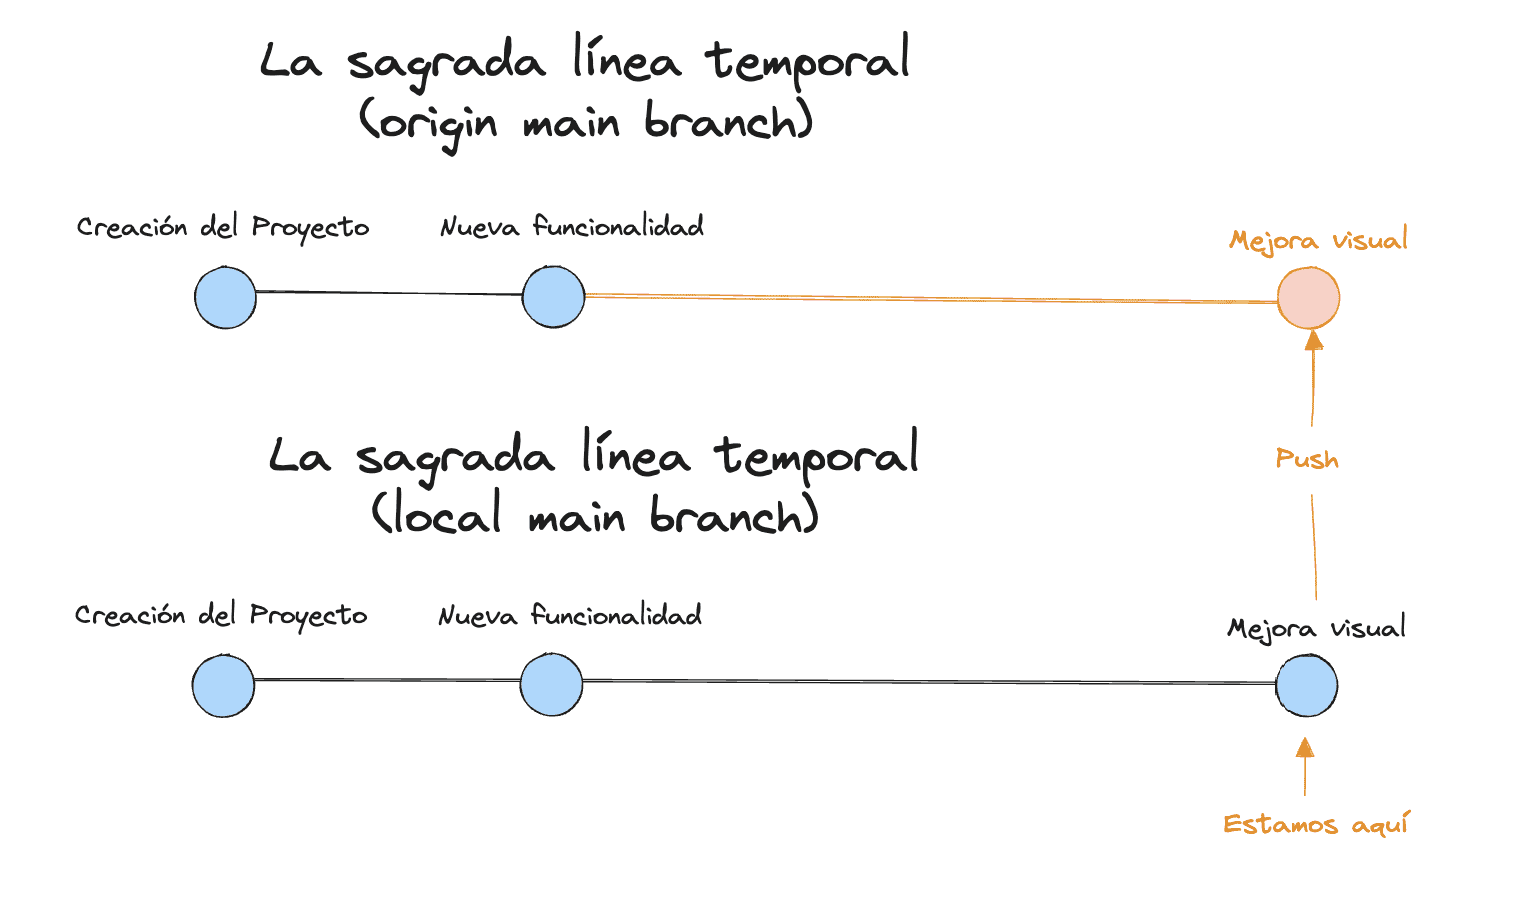
Git Pull, Push
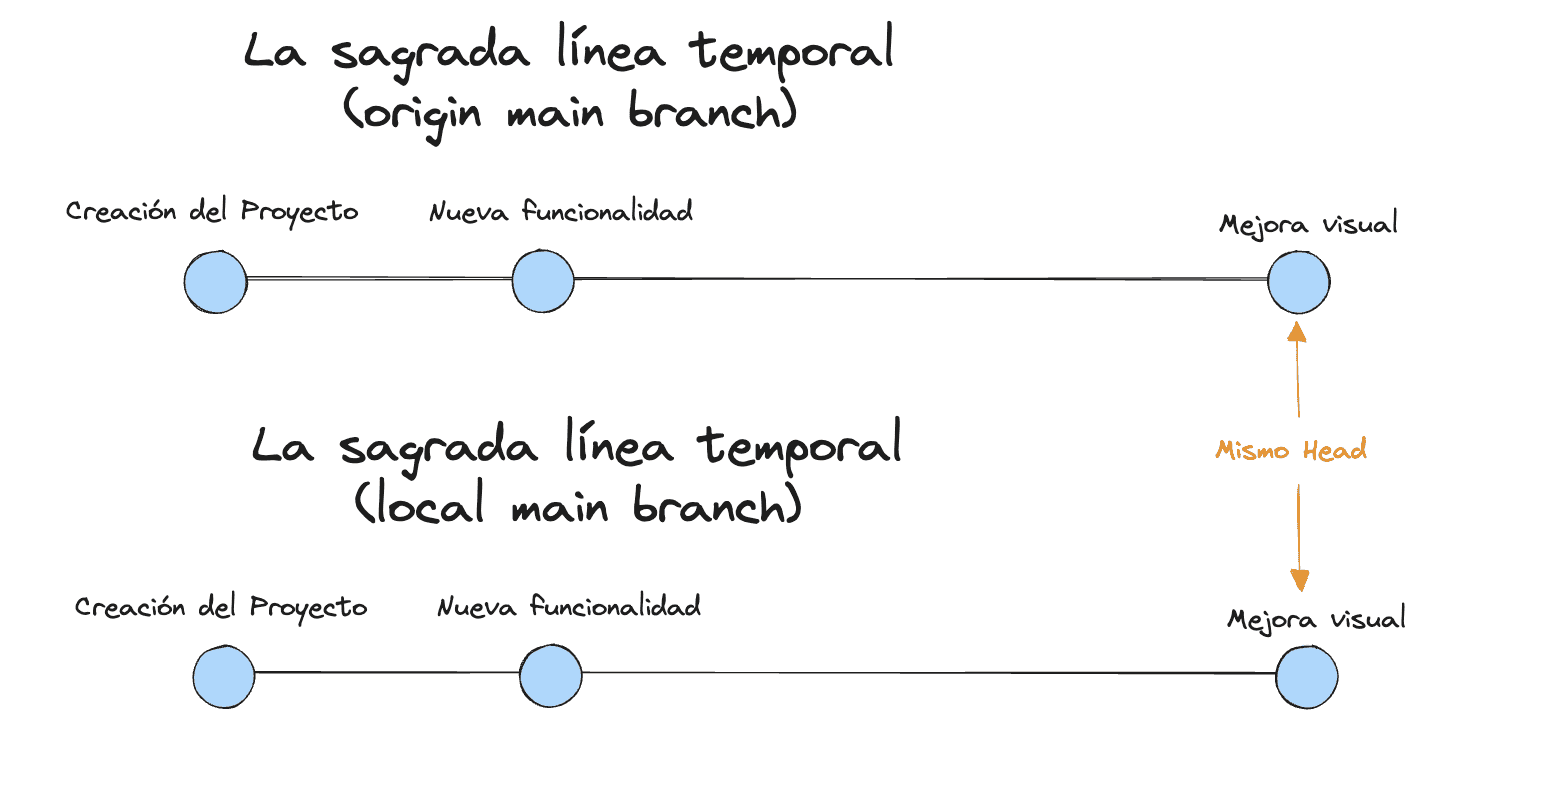
Once we have configured our remote repository, we can synchronize our changes. When we want to send our local versions to the remote repository, we use the git push command:
git push origin main
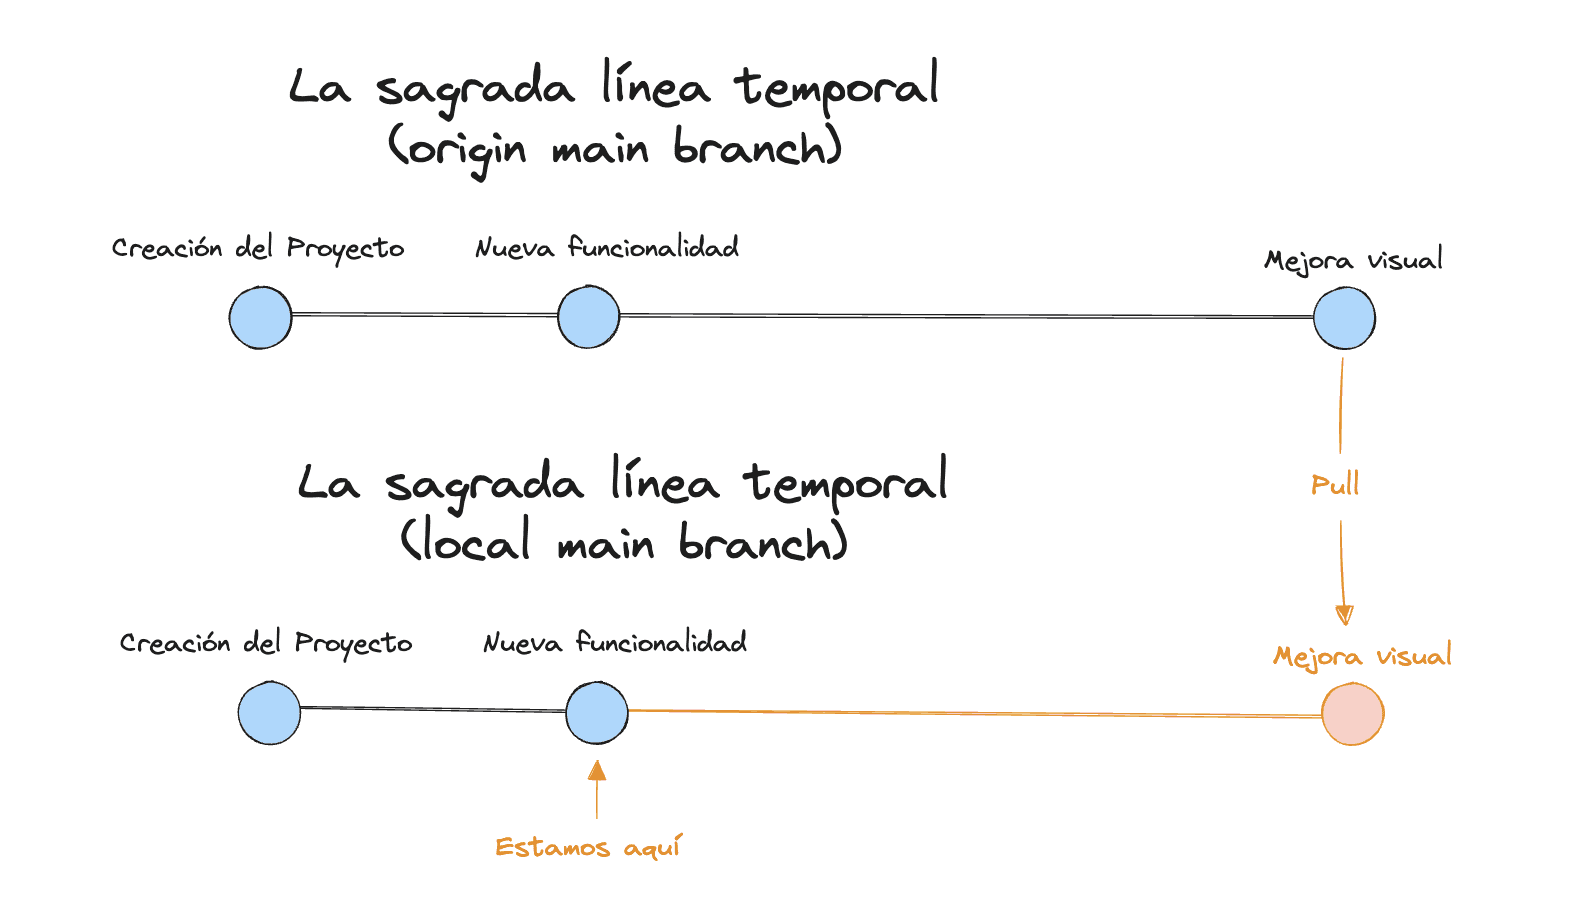
This sends the commits from our local main branch to the remote repository origin. But if we want to get the latest changes from the remote repository and apply them to our local timeline, we use the git pull command:
git pull origin main
This command downloads the changes from the remote repository and integrates them into our local branch.
Finally, if at any point we want to see the configured remote repositories or change any of them, we can use:
git remote -v
This command shows the URLs of the remote repositories associated with our local repository.
Similarly, when trying to combine the remote timeline with the local one, conflicts can occur, which must be resolved as we indicated earlier.
Git Fetch
Before diving into the details of synchronization and merging changes, it is essential to understand how Git allows us to be aware of changes in the remote repository without necessarily integrating them into our local timeline immediately. This is where the git fetch command comes into play.
git fetch origin
It downloads the latest commits, files, and branches from the remote repository origin, but does not merge them with our current branch. This way, we can review the new timelines (the changes in remote branches) without compromising our current work.
Maintaining the Sacred Timeline
Over time, you'll want to combine changes from different branches to integrate all new features or fixes into the main timeline in a remote and collaborative environment. This is where code reviews come into play.
PR or MR Concept
In collaborative projects, before merging branches, it is common to perform a code review through a Pull Request (PR) or Merge Request (MR). This means that another team member reviews the proposed changes before they are integrated into the main timeline. This process ensures that the code meets project standards and reduces the possibility of introducing errors.
Improving the Readability of the Sacred Timeline
A very important part of timeline management is not only being able to access each point of it when necessary, but also understanding what has happened. This is why in recent years habits have been established that try to improve this aspect, regardless of the number of commits generated during development.
To maintain a clean and readable commit history, Git offers several tools. Two of the most useful are squash and rebase.
Squash
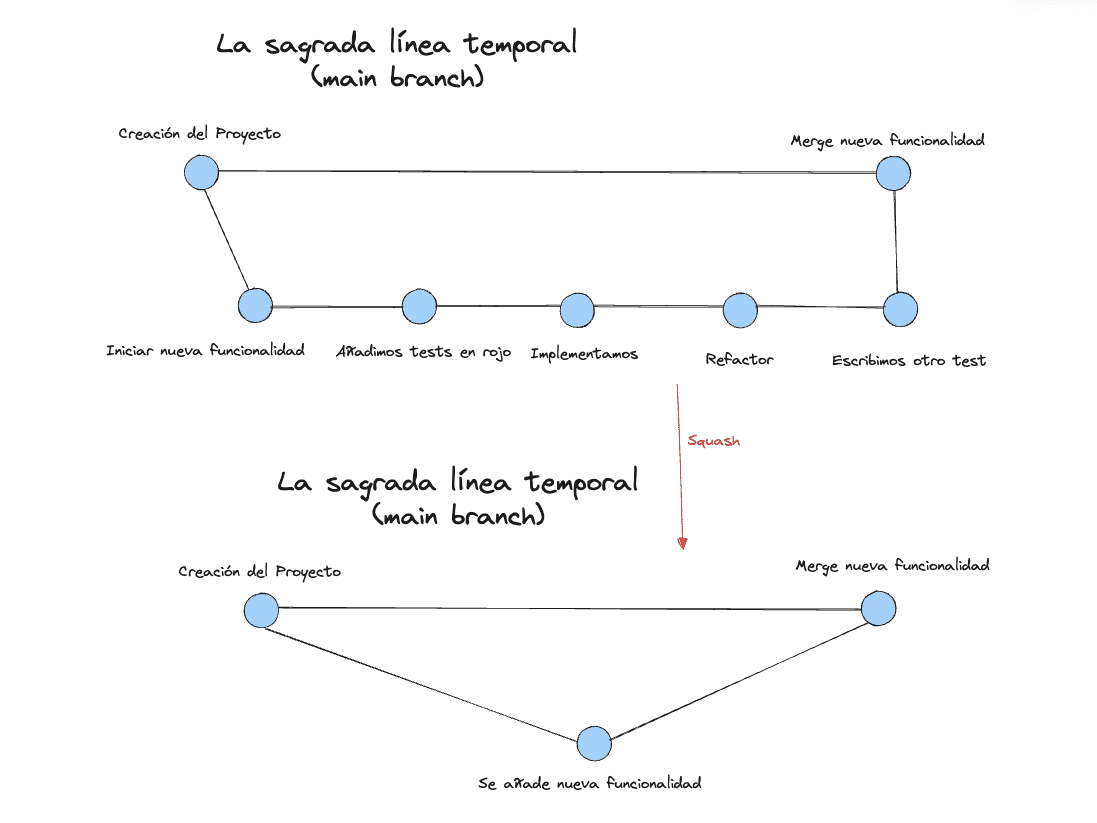
The squash command allows you to combine multiple commits into one. This is useful when we have made many small commits while developing a feature, and now we want all that work to appear as a single commit in the timeline.
git rebase -i [commit-antecesor]
Using interactive rebase (-i), you can select the commits you want to "squash" and combine them into a single commit.
Rebase

The rebase command is another powerful tool that allows you to reorganize or rewrite the commit history of a branch. Instead of simply merging branches, rebase re-applies the changes from one branch onto another, creating a linear and cleaner history:
git rebase [rama-destino]
This command takes all the commits from the current branch and applies them onto the target-branch, eliminating forks in the timeline.
For example, if you have been working on a feature branch and want to bring the latest changes from main without a traditional merge, you can do:
git rebase main
At the end of this process, the feature commits will appear as if they had been made after the most recent commits in main, making the history more linear and easier to follow.
When we perform these actions, it might be the case that we are not able to push them to the remote branch, due to an inconsistency regarding existing commits. This is why we must "force" the code upload.
git push --force
We must do this very carefully and only when we ensure that we have all the changes introduced in the remote branch in our local environment. That is, that no one has uploaded code while we were working in the local environment.
Another way to do it is by using --force-with-lease which does the same as --force but ensures there are no changes in the remote branch.
git push --force-with-lease
A good way to guarantee this and solve conflicts that may exist prior to merging the code is to use the following command:
git pull origin main --rebase
This command performs a rebase of our local changes over the most recent changes in the remote repository. That is, instead of creating a merge commit, Git applies our local commits "on top of" the commits that have been added to the remote repository. This allows maintaining a linear commit history, eliminating forks and making the timeline easier to follow.
The use of --rebase is especially useful in large teams, where the project history can quickly become complex due to multiple branches and merges. By using rebase, we facilitate navigation through the commit history and make continuous integration simpler and cleaner.
